Full guide on using CapacitorJS to build a native iOS app
Inspired by @disistemas’s recent post, I decided to check out CapacitorJS. It feels to me like the perfect fit for Redwood in that you only need to build your frontend once, unlike RN and similar solutions.
Because Capacitor is designed to be included in a project directly, I don’t feel it makes sense to add a new side for it - especially because if you want to use any of the plugins, you’ll need to install those to the web side anyway.
These instructions are partially iOS specific - if you want to build for Android, you can still use these setup instructions.
I also use TailwindCSS, but you can generally do the same with any other way of doing CSS.
Getting started
First, install the requisite packages to your web side:
yarn workspace web add @capacitor/core && yarn workspace web add @capacitor/cli -D
Next, so we can easily run the Capacitor CLI commands from the root directory, add the following to your root package.json:
// package.json
"scripts": {
  "cap": "yarn workspace web run -- cap"
},
Then, create the capacitor config file. Run yarn cap init, which will ask you some questions and then create a capacitor.config.ts file in the root of your web side. Because there’s no way to tell Capacitor to look anywhere else, you can’t move it, for example, into web/config - you’ll need to leave it there.
Mine looks like this:
// web/capacitor.config.ts
import { CapacitorConfig } from '@capacitor/cli'

const config: CapacitorConfig = {
  appId: 'app.spoonjoy',
  appName: 'spoonjoy',
  webDir: 'dist', // note that this is where RedwoodJS will build your project - the default Capacitor path is 'www'
  bundledWebRuntime: false,
}

export default config
To prepare for building our native app(s), I would also recommend modifying the config to output your native apps outside of your web workspace. For example, for iOS, add this to capacitor.config.ts:
ios: {
  path: '../ios',
},
Then, install the platforms you want. I only wanted iOS, so I ran yarn workspace web add @capacitor/ios. (You can always add more later.)
Create the project for your native app: yarn cap add ios.
If this is your first time developing an iOS app, you’ll also need to install Xcode and cocoapods. Grab Xcode from the App Store, and run brew install cocoapods. (see here for Capacitor’s full environment setup instructions.)
If you run into any weird errors at the pod install stage, run sudo xcode-select --reset && rm -rf ios and then try yarn cap add ios again.
The next stage is to set up a CORS config to allow your app to access your API. This can get pretty involved, so I would refer to the Redwood docs on this: Cross-Origin Resource Sharing | RedwoodJS Docs
Next, to sync the web app to the native app, run: yarn rw build web && yarn cap sync.
Xcode time!
Now it’s time to set up your native app. Start by opening your project in Xcode by running yarn cap open ios. Xcode should open your newly created project - start her up by selecting a simulator and hitting the play button:

Your app should open in the emulator - it’s not perfect yet, but we’ll get to that in a bit:

This is also a good time to spin up your API server. Back in Redwoodland, run yarn rw dev --fwd="--allowed-hosts all".
Interlude: improving the development experience
We don’t want to run that build and copy command every time we make a change, right? Setting up Live Reload should fix this. See here: Live Reload | Capacitor Documentation
I found that Live Reload was difficult to use and not predictable, so instead I added another script to my
package.json:
"cap:bso": "yarn rw build web && yarn cap sync && yarn cap open ios"
Additionally, you can open a debugger specific to the native app. (For example, for iOS, you can open the Safari dev tools.) See here: Debugging | Capacitor Documentation
Common Issues
At this point, you might run into some weird issues. I’ve begun to compile some common ones, and will continue to grow this list.
Our app overlaps with the status bar and home bar
Our app overlaps with the status bar and home bar
The issue here is that while normally we want our site to fill the browser, on iOS, there’s a notch and status bar on the top that gets in the way, and a home bar on the bottom! So what do we do? We add padding to the site!
Additionally, if you have any scrolling pages, even with padding, they’ll scroll right into the status bar! The easiest thing to do is to just place an opaque bar to cover that area. So, we’ll do that as well.
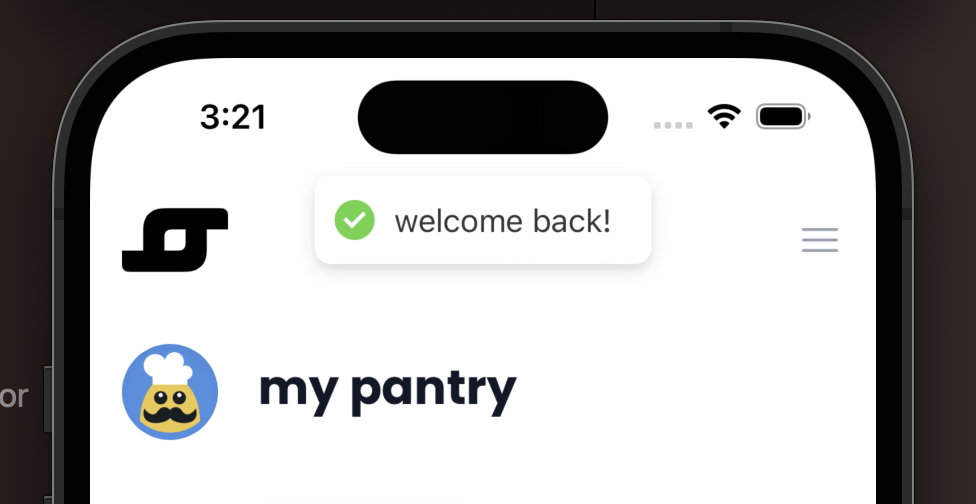
One last thing - we don’t want to forget about Toast notifications. Those want to go at the very top of the screen, so they’ll get totally covered up. We’ll want to add a margin to push that down.

But how do we know how large that space should be? It varies by device. Thankfully, we have the env(safe-area-inset-*) variables at our disposal (see here: env() - CSS: Cascading Style Sheets | MDN).
Per the MDN docs, first, add the following in the head tag of index.html:
<meta name="viewport" content="viewport-fit=cover, width=device-width, initial-scale=1.0">
You probably already have a
viewporttag withcontent="width=device-width, initial-scale=1.0"as an attribute (Redwood generates this). We need to addviewport-fit=coverat the beginning of that, or this won’t work.
Then, in index.css, add the following classes:
.top-safe-cover {
  height: env(safe-area-inset-top);
  position: fixed;
  top: 0; left: 0; right: 0;
  z-index: 9999;
}

.safe-area-padding {
  padding: env(safe-area-inset-top) env(safe-area-inset-right)
    env(safe-area-inset-bottom) env(safe-area-inset-left);
}
If you were using
h-screencss classes anywhere, you’ll need to switch to usingh-fullon all the parent tags (so it bubbles down) instead. Otherwise, yourh-screencomponent will now be taller than the screen because it’s pushed down by the padding.
Now, update index.html to fix the first two issues:
- <body class="h-full">
+ <body class="h-full safe-area-padding">
   <div id="redwood-app" class="h-full">
+    <div class="top-safe-cover bg-white" />
     <!-- Please keep the line below for prerender support. -->
     <%= prerenderPlaceholder %>
   </div>
 </body>
You can give the
top-safe-cover<div />whatever style matches your app - I just gave it an opaque white background.
Then, for the <Toaster /> component, I had trouble getting this to work with classes, so I just applied the style directly (max() usage is so that we still have some padding where safe-area-inset-top is 0):
  <Toaster
+   containerStyle={{
+     top: 'max(1rem, env(safe-area-inset-top))',
+   }}
    toastOptions={{
      className: 'rw-toast',
      duration: 6000,
    }}
  />
Now, everything should look great as far as the header is concerned!
Images don't show up
Images don’t show up
I ran into a weird issue where my images weren’t showing up - the network debugger was showing status code 200, but it wasn’t actually getting any content.
In my case, I’m using Cloudinary, and has been doing automatic format selection. For whatever reason, iOS doesn’t like this, and seems to want specifically a JPG. Once I removed f_auto from my image URLs, it worked.
Images are blurry
Images are blurry
If you’re dynamically sizing images based on window.screen.width, you can’t. iOS devices use scaling factors, so you need to instead use window.screen.width * (window.devicePixelRatio || 1) to get the true pixel width.
Adding your branding
UNDER CONSTRUCTION - but see GitHub - ionic-team/capacitor-assets: Local Capacitor icon/splash screen resource generation tool
Building the app for production
I haven’t done this yet myself, and will update this section once I do ![]()
I expect that at minimum, we’ll need to point the app to use the production API url, and I don’t want to need to change configuration files between building for dev and building for prod. Stay tuned!
Let me know if anything was unclear or if you have any questions!