
In this example we will show how you can combine multiple GraphQL APIs generated with RedwoodJS into a single StepZen schema that is then queried from another RedwoodJS app.
Uhhhh… sounds cool, but why?
Because we can.
Create Redwood Apps
Seriously though, why would anyone ever do this? What if you wanted one app to function as a standalone CMS with a public endpoint and another for user management? You could create two separate Redwood apps, one that implements authentication and another that just holds content.
Create Redwood App for Posts
yarn create redwood-app stepzen-redwood-posts
cd stepzen-redwood-posts
Create Posts schema
datasource db {
  provider = "postgresql"
  url      = env("DATABASE_URL")
}

generator client {
  provider      = "prisma-client-js"
  binaryTargets = "native"
}

model Post {
  id        Int      @id @default(autoincrement())
  title     String
  body      String
  createdAt DateTime @default(now())
}
Provision a PostgreSQL database with Railway
First you need to create a Railway account.
Install the Railway CLI
railway login
🚝 Logging in... No dice? Try railway login --browserless
🚄 Logging in...
🎉 Logged in as Anthony Campolo (anthony@email.com)
Initialize project
Run the following command and select “Create new Project.”
railway init
✔ Create new Project
✔ Enter project name: stepzen-redwood-posts
✔ Environment: production
🎉 Created project stepzen-redwood-posts
Provision PostgreSQL
Add a plugin to your Railway project.
railway add
Select PostgreSQL.
✔ Plugin: postgresql
🎉 Created plugin postgresql
Set environment variable
Create a .env file with your DATABASE_URL.
echo DATABASE_URL=`railway variables get DATABASE_URL` > .env
Setup database with Prisma Migrate
Running yarn rw prisma migrate dev generates the folders and files necessary to create a new migration. We will name our migration posts-table.
yarn rw prisma migrate dev --name posts-table
Generate scaffold
yarn rw g scaffold post
Start the development server and open http://localhost:8910/posts to create a couple blog posts.
yarn rw dev

Setup Netlify Deploy
The following command will generate the configuration file needed to deploy to Netlify.
yarn rw setup deploy netlify
This generates the following netlify.toml file:
[build]
  command = "yarn rw deploy netlify"
  publish = "web/dist"
  functions = "api/dist/functions"

[dev]
  framework = "redwoodjs"
  targetPort = 8910
  port = 8888

[[redirects]]
  from = "/*"
  to = "/index.html"
  status = 200
This lets Netlify know that:
- Your
buildcommand isyarn rw deploy netlify - The
publishdirectory for your assets isweb/dist - Your
functionswill be inapi/dist/functions
After creating a GitHub repository and connecting that to your Netlify account, Netlify will build and deploy the project for you using the settings provided.
Push Project to GitHub
Create a blank repository at repo.new and push the project to GitHub.
git init
git add .
git commit -m "posts"
git remote add origin https://github.com/ajcwebdev/stepzen-redwood-posts.git
git push -u origin main
Connect Repo to Netlify
Go to Netlify and connect the repo.
Make sure to include your DATABASE_URL environment variable and add ?connection_limit=1 to the end or your database will spontaneously burst into flames.
Create Custom Domain Name

Test it with a query
Send a query to https://stepzen-redwood-posts.netlify.app/.netlify/functions/graphql.
query getPosts {
  posts {
    id
    title
    body
    createdAt
  }
}

Create Redwood App for Users
We’ll repeat most of those steps again. For simplicity of demonstrating how to stitch together multiple applications we won’t actually implement auth. You can do so by following along with the authentication section of the official RedwoodJS tutorial.
yarn create redwood-app stepzen-redwood-users
cd stepzen-redwood-users
Create Users schema
datasource db {
  provider = "postgresql"
  url      = env("DATABASE_URL")
}

generator client {
  provider      = "prisma-client-js"
  binaryTargets = "native"
}

model User {
  id        Int      @id @default(autoincrement())
  name      String
}
Provision a PostgreSQL database with Railway
railway init
✔ Create new Project
✔ Enter project name: stepzen-redwood-users
✔ Environment: production
🎉 Created project stepzen-redwood-users
Provision PostgreSQL
Add a plugin to your Railway project.
railway add
Select PostgreSQL.
✔ Plugin: postgresql
🎉 Created plugin postgresql
Set environment variable
Create a .env file with your DATABASE_URL.
echo DATABASE_URL=`railway variables get DATABASE_URL` > .env
Setup database with Prisma Migrate
Running yarn rw prisma migrate dev generates the folders and files necessary to create a new migration. We will name our migration users-table.
yarn rw prisma migrate dev --name users-table
Generate scaffold
yarn rw g scaffold user
Start the development server and open http://localhost:8910/users to create a couple users.
yarn rw dev

Setup Netlify Deploy
yarn rw setup deploy netlify
Push Project to GitHub
Create a blank repository at repo.new
git init
git add .
git commit -m "users"
git remote add origin https://github.com/ajcwebdev/stepzen-redwood-users.git
git push -u origin main
Connect Repo to Netlify
Go to Netlify and connect the repo.

Make sure to include your DATABASE_URL environment variable and add ?connection_limit=1 to the end or your database will spontaneously burst into flames.
Create Custom Domain Name

Test it with a query
Send a query to https://stepzen-redwood-posts.netlify.app/.netlify/functions/graphql.
query getUsers {
  users {
    id
    name
  }
}

Create StepZen Project
The StepZen project will combine both Redwood apps into a single schema with the @graphql directive.
mkdir stepzen-redwood-mesh
cd stepzen-redwood-mesh
index.graphql
Create an index.graphql file.
touch index.graphql
This file tells StepZen how to assemble the various type definition files into a complete GraphQL schema.
schema
  @sdl(
    files: [
      "schema/posts.graphql"
      "schema/users.graphql"
    ]
  ) {
  query: Query
}
posts.graphql
Create a directory for your schema. The schema directory will contain files for each GraphQL API.
mkdir schema
Create a posts.graphql file for your Post type.
touch schema/posts.graphql
type Post {
  id: Int!
  title: String!
  body: String!
  createdAt: DateTime!
}

type Query {
  posts: [Post!]!
    @graphql(
      endpoint:"https://stepzen-redwood-posts.netlify.app/.netlify/functions/graphql"
    )
}
users.graphql
Create a users.graphql file for your User type.
touch schema/users.graphql
type User {
  id: Int!
  name: String!
}

type Query {
  users: [User!]!
    @graphql(
      endpoint:"https://stepzen-redwood-users.netlify.app/.netlify/functions/graphql"
    )
}
Deploy your endpoint with stepzen start
stepzen start
You will be asked to name your endpoint. I will call mine api/stepzen-redwood-mesh.

Enter the following query, hold your breath, cross your fingers, say seventeen Hail Marys, and run the query.
query MySuperAwesomeQueryThatWontFail {
  users {
    name
    id
  }
  posts {
    title
    id
    createdAt
    body
  }
}

Create Meta-Redwood App
Now that we’ve created our API, we need to connect another Redwood app to StepZen to get the data into our web side.
yarn create redwood-app stepzen-metawood
cd stepzen-metawood
Oh god what have I done
The api/src directory contains all the other backend code for a Redwood app and includes four directories:
functionsgraphqllibservices
The functions directory contains a graphql.js file auto-generated by Redwood that is required to use the GraphQL API. Since we will not use the Prisma client or a database that Redwood comes preconfigured for, we can replace the default template with the following code.
// api/src/functions/graphql.js

import {
  createGraphQLHandler,
  makeMergedSchema,
  makeServices,
} from '@redwoodjs/api'

import schemas from 'src/graphql/**/*.{js,ts}'
import services from 'src/services/**/*.{js,ts}'

export const handler = createGraphQLHandler({
  schema: makeMergedSchema({
    schemas,
    services: makeServices({ services }),
  }),
})
posts.sdl.js
The graphql directory contains posts.sdl.js with your GraphQL schema written in the Schema Definition Language. This will ensure that our Redwood API will have a schema that matches our schema in posts.graphql.
touch api/src/graphql/posts.sdl.js
The schema includes a Post type, and each Post has an id, title, body, and createdAt date just like our StepZen schema. The posts query returns an array of Post objects.
// api/src/graphql/posts.sdl.js

export const schema = gql`
  type Post {
    id: ID
    title: String
    body: String
    createdAt: String
  }

  type Query {
    posts: [Post]
  }
`
users.sdl.js
Create a users.sdl.js file so our Redwood API will have a schema that matches our schema in users.graphql.
touch api/src/graphql/users.sdl.js
The schema includes a User type, and each User has an id and name just like our StepZen schema. The users query returns an array of User objects.
// api/src/graphql/users.sdl.js

export const schema = gql`
  type User {
    id: ID
    name: String
  }

  type Query {
    users: [User]
  }
`
client.js
While Redwood’s web side includes Apollo Client by default, its api side does not include any built in mechanism for making HTTP requests.
We will follow the model of numerous community projects that have used graphql-request to connect to services such as Contentful, AppSync, Hasura, and FaunaDB. First, we need to install graphql-request as a dependency on the api side.
yarn workspace api add graphql-request
Since we will not be using the Prisma Client we can rename db.js to client.js
mv api/src/lib/db.js api/src/lib/client.js
Include the following code in the newly named file.
// api/src/lib/client.js

import { GraphQLClient } from 'graphql-request'

export const request = async (query = {}) => {
  const endpoint = process.env.API_ENDPOINT

  const graphQLClient = new GraphQLClient(endpoint, {
    headers: {
      authorization: 'apikey ' + process.env.API_KEY
    },
  })
  try {
    return await graphQLClient.request(query)
  } catch (err) {
    console.log(err)
    return err
  }
}
This code uses graphql-request to connect to StepZen and query the API along with our StepZen API key in the header for authorization.
-
endpointis set to the url generated when we deployed our API withstepzen start. -
authorizationincludes your StepZen API key appended toapikey. You can get your API key on your my account page.
Create .env file
Let’s create the .env file that will contain our StepZen API key and endpoint URL.
API_ENDPOINT=<YOUR_API_ENDPOINT>
API_KEY=<YOUR_API_KEY>
posts.js
In the services directory we will create a posts directory with a posts.js service and a users directory with a users.js service. These files will send GraphQL queries to our StepZen API.
mkdir api/src/services/posts api/src/services/users
touch api/src/services/posts/posts.js api/src/services/users/users.js
We will include code for querying data with GraphQL.
// api/src/services/posts/posts.js

import { request } from 'src/lib/client'
import { gql } from 'graphql-request'

export const posts = async () => {
  const GET_POSTS_QUERY = gql`
    query getPosts {
      posts {
        id
        title
        body
        createdAt
      }
    }
  `

  const data = await request(GET_POSTS_QUERY)

  return data['posts']
}
GET_POSTS_QUERY is sent with the GraphQLClient imported from src/lib/client. The query is asking for the list of posts and their id, title, body, and createdAt date.
// api/src/services/users/users.js

import { request } from 'src/lib/client'
import { gql } from 'graphql-request'

export const users = async () => {
  const GET_USERS_QUERY = gql`
    query getUsers {
      users {
        id
        name
      }
    }
  `

  const data = await request(GET_USERS_QUERY)

  return data['users']
}
GET_USERS_QUERY is sent with the GraphQLClient imported from src/lib/client. The query is asking for the list of users and their id and name.
The api side can be accessed through a GraphiQL explorer running on localhost:8911/graphql.

The Redwood Web Side
Now that the API and query are set up, we need to connect the web interface to display the returned data. The web side contains a PostsCell for fetching posts, a UsersCell for fetching users, and a HomePage for rendering the cell.
PostsCell
Create a PostsCell.
yarn rw g cell posts
getPosts returns the id, title, body, and createdAt date of each post. This will send the query to our api side, which in turn sends a query to our StepZen API which in turn sends a query to our stepzen-redwood-posts API. Once the results are returned, they will be output on the page. Redwood automatically adds basic handling for the Loading, Empty and Failure states.
// web/src/components/PostsCell/PostsCell.js

export const QUERY = gql`
  query getPosts {
    posts {
      id
      title
      body
      createdAt
    }
  }
`

export const Loading = () => <div>Almost there...</div>
export const Empty = () => <div>WE NEED POSTS</div>
export const Failure = ({ error }) => <div>{error.message}</div>

export const Success = ({ posts }) => {
  return (
    <ul>
      {posts.map(post => (
        <li>{post.title}</li>
      ))}
    </ul>
  )
}
UsersCell
Create a UsersCell.
yarn rw g cell users
getUsers returns the id and name of each user. This will send the query to our api side, which in turn sends a query to our StepZen API which in turn sends a query to our stepzen-redwood-users API.
// web/src/components/UsersCell/UsersCell.js

export const QUERY = gql`
  query getUsers {
    users {
      id
      name
    }
  }
`

export const Loading = () => <div>Almost there...</div>
export const Empty = () => <div>WE NEED USERS</div>
export const Failure = ({ error }) => <div>{error.message}</div>

export const Success = ({ users }) => {
  return (
    <ul>
      {users.map(user => (
        <li>{user.name}</li>
      ))}
    </ul>
  )
}
HomePage
Finally, let’s create the home page.
yarn rw g page home /
All we need to do in this file is import PostsCell and UsersCell to display the information fetched by the respective cell’s queries.
// web/src/pages/HomePage/HomePage.js

import PostsCell from 'src/components/PostsCell'
import UsersCell from 'src/components/UsersCell'

const HomePage = () => {
  return (
    <>
      <h1>StepZen+Metawood</h1>

      <h2>Posts</h2>
      <PostsCell />

      <h2>Users</h2>
      <UsersCell />
    </>
  )
}

export default HomePage
View your new monstrosity
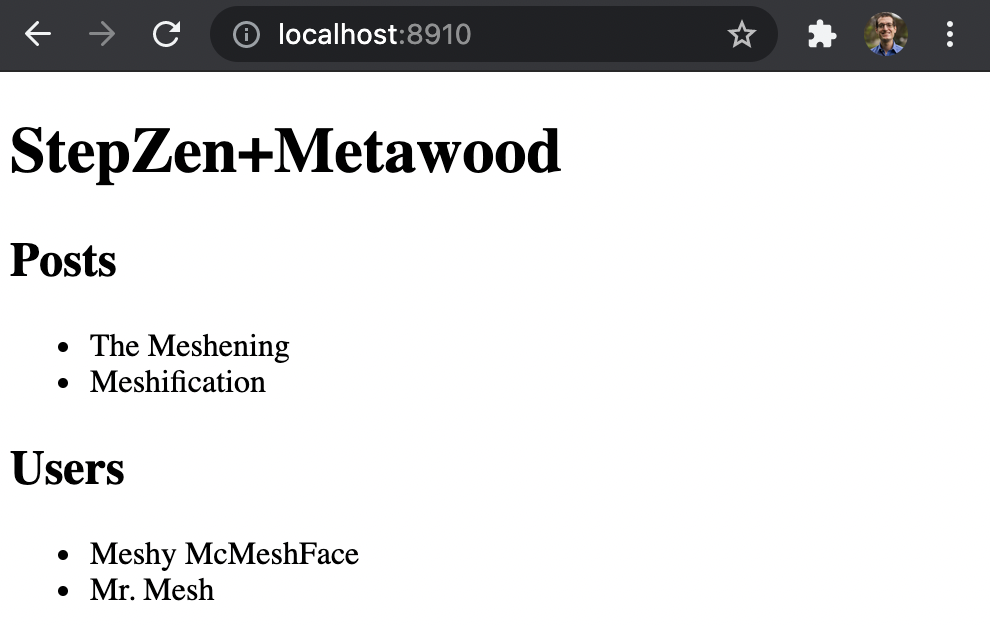
And there you go, now you can tell your boss you know how to create a service mesh made of monolithic microservices and you need a 20% raise immediately. The code for this project can be found on my GitHub.